Wednesday, August 31, 2011

Day 7 & 8, Demolition Day! Carpe Diem!

We seized the moment.....a certain someone with certain demo skills was available and to help us out with some plans to demo an upstairs bathroom, so we re-directed our priorities and took him up on his offer. We had planned to paint the ceiling in the kitchen, but directly over that was the bathroom in need of demo. I thought it would be a good idea to get the dirty work done so it would not affect our new paint job. Sometimes remodeling plans have to be diverted based on sequence, and when free labor is available.

Introducing James the Destroyer! For those of you who do not know who James is, he is my son Hudson's father. We have been divorced for about 5 years now and get along just fine as divorcee parents. He is one of the strongest men I have ever met and he demo'd this bathroom in about 2 hours. Awesome and Scary at the same time.
Looks easy enough....


Special Note: Information on the type of framing this Old House has by Carlotta Puckett: 
Long studs are used that run from sill plate to eave line with intermediate floor structures nailed to them. The height of the window sill, the door headers and floor heights were marked on a “storey pole” This allowed for the building boom at the late 1800 because unskilled carpenters could use the storey poles instead of accurate measuring.
Skilled carpenters looked on at the comparatively thin framing members, all held together with nails, and declared this method of construction to be no more substantial than a balloon. 
(it has lasted for over 100 years!)


That would be Mini Me Hudson the Destroyer! 

No, this is not from an Earthquake or a Hurricane, just two boys!
He finally stopped.....and squatted down for a moment.....

DAY 8 ******CLEAN UP TIME!!! My Mom & I did all the clean up and it took us about 3-4 hours!  We saved about $2000 doing this ourselves. Hard work, but worth the savings!
We totally saved all the old lumber, because it is strong, and in very good re-usable shape!
Poor Lil' Dog, she tried to help, she was covered in plaster dust.
Amazing clean up effort, look at that!!!!!!
Now we can see the room dimensions and start the floor plan.
I can see it now, the shower stall, the claw foot in front of the window and a nook for the toilet.
Walk in closet & linen closet area.
This is the result of two walls with layers of plaster, old drywall, paper, and MUCK! But it is OUTTA there!
CARPE DIEM!!!!!


Monday, August 29, 2011

Day 6, Thinking Outside the Light Bulb

Let's Talk Period Lighting....I bought an old house, yes, so I need lighting in various rooms and you have to consider the Era of the house and the style of lighting. This house was built somewhere between 1870-1900. Even if  I or YOU, didn't have an old house, you could still enjoy period lighting mixed into your eclectic decor. So, I sat and thought for a moment, with a light bulb balancing over my head in mid air, no doubt, and I wondered what type of lighting do I really like......tick tock tick tock tick tock.....thinking.....

I decided that the terms 'Time Worn' and 'Charming' and 'Unpretentious' were descriptive words to what style I preferred. I would describe it as a cross between Period Basic and Art Nouveau. Blending utility with an artistic flare that is straightforward and functional. Did I just send you a motivating surge to pick out a new pendant?

Headed to the Restore (Habitat) in Raleigh to search for lights. They had a great selection of used lights and many older ones, which I was looking for.


 This is hanging in the kitchen. I still have to paint the ceiling, but I couldn't see when I took the old light down.
This is my office & art studio and a little inspiration to create something.....
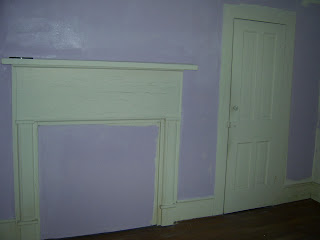
This light is hanging in the Family room with the Marina Bay Benjamin Moore Wall color. The fireplace hole cover was strangely a similar shade of green and in the house!

 I did the wiring and hanging, it wasn't easy, I had to piece a few parts together, but it was worth it! I would get it all wired up, then realize I forgot a nut or chain link and had to re-do each light at least once!

Sunday, August 28, 2011

Day 5, Painting & Dreaming, Carnival of Color!

I am still painting....which will take a while.... & dreaming a little about the decorating. I try not to get ahead of myself, but I can't keep my creative thoughts dormant for longer than a few minutes. I may take notice of my new street out the window and see the stray white cat walk across my porch, the one that mutters meows of woe at us when we come and go. I may glimpse at  the tiny pink blooms out the back window that bounces in the afternoon wind. But soon I find myself right back to thinking about decorating and coordinating all the colors & fabrics & furniture.......and YES, I am painting in a polka dot skirt, again.....
                                                                Cause that's how I ROLL.


I keep wanting to tear down the old blinds and let the light in. I see color, lots of bright happy hues, aquas, greens, pinks & corals. All the colors of small town Carnival.

This is my wall color in a few rooms Marina Bay. Here are some fabric ideas for curtains and furniture. I am dreaming about living life like it is a Carnival of Color.

Thursday, August 25, 2011

Day 4-Going Green

As I peel away the layers of this old house, I try to keep in mind what can be re-purposed or face lifted. Anything that I can keep and use, I will try to keep in the remodeling plans. I think it is important to our environment and it also instills the integrity of the old house charm.
                                                                                                                                                   

On this day, I found Bead Board underneath the acoustic ceiling in the kitchen. I was very happy to discover that underlying re-usable surface. I love the old weathered looking boards, they have something very charming about them. I get tired of drywall, there are other options and more interesting surfaces. 
Can't do much with the acoustic tile, it feels very crumbly, like it will bio-degrade quickly. We hope! There are programs by Armstrong and Winroc to recycle old ceiling tiles into new ones, but I didn't find this out until after I threw them in the dump. I think they are made of paper, so that makes me feel a little better.
Now to pull out about 500 staples and we can start to Paint it!
One of the colors I chose for a few rooms is Marina Bay, by Benjamin Moore. It is in between Aqua and Green and has a very pleasant calming hue.It doesn't really match anything I have, but I want to start with the paint as my primary color in the room. It's kind of like buying a pair of earrings that you like, then looking for an outfit to match it. Must be an Artist thing....
Look at that, I recycled a piece of the ceiling tile to use as a paint tray, maybe I can paint a picture on it too!

Sunday, August 21, 2011

Day 3, Cool Colors & Cute Culprits!

As a decorative painter, I have chosen so many paint colors for clients, but when it came to my own personal color scheme, I was having a hard time! First Stop, Benjamin Moore store. I can't express enough the difference between Ben Moore paint and any other, It is the best....So I went to the closest Ben Moore represented store called Proffitt Lumber in South Hill VA. This guy looked a little frightened when I asked him if I could take his picture for my blog. We was working away, but stopped to pose for me. I really just wanted his hat, but I think he was flattered overall.

We thumbed through the paint deck and I had an idea of colors and a few other paint chips I had brought along. I knew I needed bright white for the ceilings and saved a little on the 5 gallon bucket. I knew I wanted white trim paint in semi-gloss. I knew I wanted a COOL color scheme, and I was thinking coastal cottage, with aquas and sea foam green. I really want to try a lavender, but it had to be the right color of lavender. M paint mixer did a great job mixing the colors I wanted.   
 
The first culprit was my dear friend Carlotta, who surprised me by showing up to help out with sanding and modeling paint colors and drawing lay out designs on her graph paper. She is very good at space planning and sharing ideas!

Yes, it is true, I will work for a new pair of shoes, but with the new house, I might want to reconsider that!
Here is the other culprit, who really didn't want to be there with all that work going on. She helped sand a little, but mostly licked up drywall dust.

Thursday, August 18, 2011

Day 2, What Lies Beneath the Surface

You never know what you will find underneath things in an old house. There were big rugs on the floor covering the very nice hardwood, , but when we went to roll up the old rugs to clean, the padding was stuck to the floor. I think they were just old and had dry rotted and started to crumble and break down. My son Hudson was a trooper, on his hands and knees scraping it off. Look at his pile! This earned him a new XBOX game!
 Here is Jordan and Hudson both scraping and cleaning up the powdered mess.
 In another room, we started to pick at the painted wallpaper, OOPS! It was holding up some plaster! The holes got a little bigger, but no worries, a little drywall patch, a lot of mud, sanding, primer, and paint on it's way!                                           Yes, I am working in a dress, it happens!
 This was a first for me! Concrete patching on the inside of the house. It was sticking out in a lumpy fashion and I knocked it down and out so I can get some drywall mud on it!
My Tips: Scrape it off, dig it out, get the bad stuff off the walls, then you can repair it with drywall pieces cut out to match the holes, then mud. I will have to screw into the plaster slat boards to brace it. I will post pics of this process for you!

Monday, August 15, 2011

Day 1, Part 2, Paint Everything!

Look at this Gorgeous Knotty Pine Cabinetry in the kitchen and throughout the dining room! NOT! I can't wait to get it painted, but I totally admire the quality of this fine wood. I love the scallop edges on the cabinets and they will look so good in white! Bright White, I think so.
                                         

                                 Here is the Dining Room in wall to wall Knotty Pine. Can't wait to get                                           my  roller on that room! 
                                

      Here are the critters checking out the place, wonder what is up there? Look at that classic stair case!

 This is how I check out the under lying floor. In the kitchen behind the frig....I was hoping for hard wood but it looks pretty rough, so we will go with new flooring, maybe black & white checkered tiles?
 Most of the floors look like this, but we had to scrape up the old padding that was stuck to the floor.Wucky!

Day 1, Investigative Repurposing-The 4 R's


Our first few minutes in the new house and we came in swinging hammers. Most people might want to meet the neighbors, memorize the zip code, or decide which room Grandma will sleep in when she visits, but not me. I needed to investigate what was lying beneath the surface. What architectural treasures were there waiting to be discovered.

On my mind sense we first saw the house,  was the surround on the claw foot tub.Was the tub rusted, legless, un-salvageable?

Bring on the HAMMER!

Hudson was instructed to gently break away the old T & G board, because I had an idea to re-use it...hmmmmmm


Look at that! A perfectly preserved Claw Foot Tub with FEET! All she needs is a little paint and some Golden Feet!


By the next day I had already installed the new back to this Wardrobe with the boards from the Claw Foot!
Reduce, Re-use, Re-cycle, Re-purpose!

Tip: I did pull out the rusty nails and clear coat the boards so no more chips would fall off or cause anything to get dirty.